本文最后更新于 905 天前,其中的信息可能已经有所发展或是发生改变。
用Docker部署RTMP推流服务器
三年前用CentOS的镜像构建过RTMP Nginx的推流服务器,前一段时间再构建的时候发现速度很慢,而且镜像很大,考虑到CentOS都已经停止维护了,于是最近用Ubuntu22.04LTS镜像升级一下,优化完成后镜像大小降了一半还要多一点,构建速度也快了很多。
优化前:
ubuntu@VM-8-3-ubuntu:~$ sudo docker images
REPOSITORY         TAG          IMAGE ID       CREATED         SIZE
rtmp               v1           0bcf5aea6d3b   38 hours ago    1.16GB
优化后:
harson@harson-virtual-machine:~/Desktop/rtmp$ sudo docker images
REPOSITORY        TAG         IMAGE ID       CREATED         SIZE
rtmp              v2          b5e94e7c3ab9   9 minutes ago   454MB
构建过程
依赖文件在文末
将dockerfile以及依赖放在同一目录后,运行
sudo docker build -t rtmp:v2 .成功构建完后运行容器
sudo docker run -p 7935:7935 -p 7938:7938 -d rtmp:v2其中7935是http端口,7938是RTMP服务端口,端口定义在 nginx.conf ,可按需修改
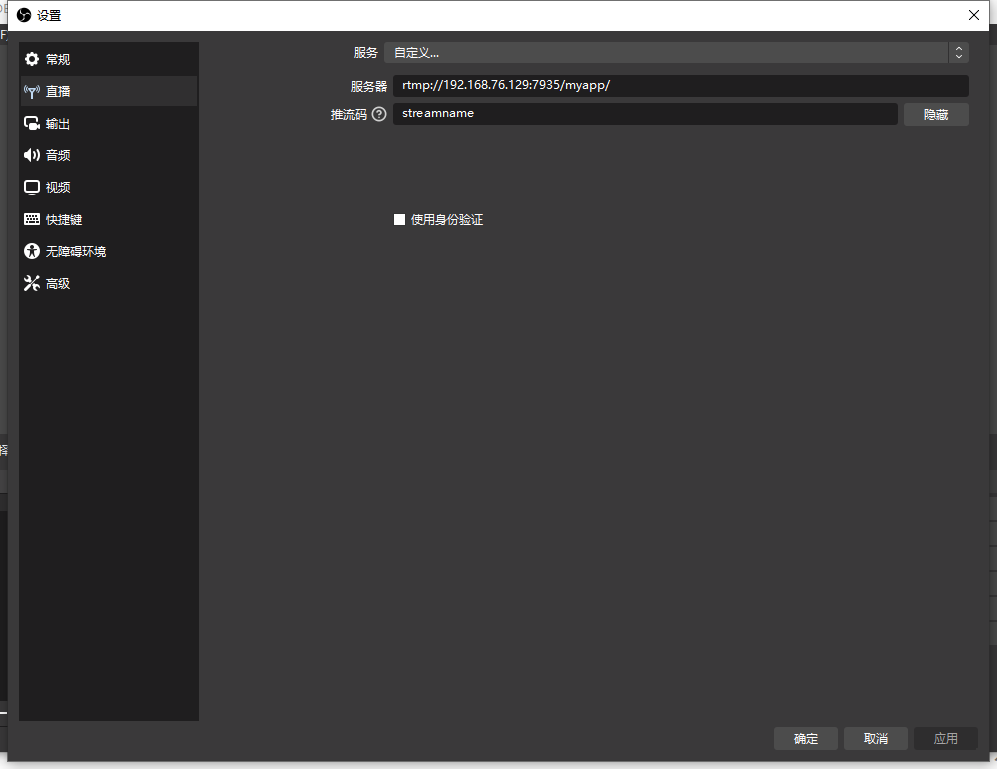
使用OBS推流

地址格式为:
rtmp://192.168.76.129:7935/myapp/streamname
其中myapp和streamname在 nginx.conf 中定义,可按需修改
使用FLV.js观看直播
通过访问html文件来观看直播,FLV.js中的地址需要修改成直播服务器的地址
<!doctype html>
<html>
<head>
    <meta charset="utf-8">
     <script src="https://cdn.bootcss.com/flv.js/1.6.0/flv.js"></script>
    <title>Live</title>
    <style>
		video{
			width: 1024px;
			height: 768px;
		}

    </style>
</head>
    <div>
        <video id="videoElement" class="centeredVideo" controls autoplay>
            Your browser is too old which doesn't support HTML5 video.
        </video>
    </div>
<script>
    if (flvjs.isSupported()) {
        var videoElement = document.getElementById('videoElement');
        var flvPlayer = flvjs.createPlayer({
            type: 'flv',
            url: 'http://192.168.76.129:7938/live?port=7935&app=myapp&stream=streamname'
        });
        flvPlayer.attachMediaElement(videoElement);
        flvPlayer.load();
        flvPlayer.play();
    }
</script>
</html>